Vinyl Graffiti Eye
Man oh man I definitely learned a lot doing this project. I knew it was going to be an experience just because I wanted to do the project so big, but I didn't know just how stressful - and rewarding - the whole process would be.
DAY 1
In the beginning I made a smaller copy to see how I would do the whole process as a test before I did the big one. I only had enough material to do my actual project once so I wanted to MAKE SURE I had the process down.

I made one that fit in my sketchbook and I thought it went pretty well. I'm happy that I did it because I had a loose idea on how to start the bigger project and it ended up being a really good reference in the future.
I started off feeding the first length of vinyl through the plotter. I made the measurements slightly smaller just to add any room for error - WHICH I AM SO GLAD I DID. The length of the first design ended up being just over 97 inches long so we had to make sure that 100 inches could run through the plotter machine straight so that it wouldn't shift off to the side and potentially screw it all up.

Because of this Bryan and I had to run the length of the vinyl through multiple times to make sure it wasn't going to screw up. This is where we ran into our first set of problems. Because of the material's nature, the more we ran it through the cutter, the more these horizontal bubbles started popping up and they ended being so large that the cutter couldn't cut through the entire section. This was manageable because it was just an extra step I had to deal with here and there when I was weeding, we just had to make sure the vinyl was straight as quick as possible. The second problem was it started bunching up and Bryan and I concluded that it was the way the vinyl was fed into the machine and how it came out. Because of this Bryan and I manipulated the space so that it would all work out as you can see in the photos below:


This system worked for the first one pretty well. It was just stressful THE ENTIRE TIME because when we pushed the button there wasn't really anything we could do beyond that. After the first one was pumped out, we decided to split the next length into two sections that that it would be less stressful. At least that's how we thought it would be haha.
I took a video of the vinyl and I'll post the link up to it once it's all edited. However I can tell you right now that I look perpetually worried and sweaty in it hahaha.
This first part of the second section worked really well. It was around 60 inches. But the last section was the smallest at 42 inches, however it was the most stressful because we couldn't use the same system as we had set up for the other ones: the way it was being fed into the machine crumpled up the vinyl during the first moments of starting it up.
So, again, we had to change the set up with Bryan and I standing at opposite ends of the machine holding on to it and constantly straightening the vinyl as you can sort of see in this photo below:

******** 4 HOURS LATER ********
ALL THE SECTIONS WERE CUT! When I looked at the designs I could see extra cuts that the plotter had made. And that some parts were not aligned. It's interesting to see - as the design scale was amplified, so were the mistakes that the plotter naturally made. Normally with smaller cuts you don't see them as much. It wasn't a huge problem, just something I had to keep in mind while weeding.

DAY 2
I managed to recruit my friend Pan to help me weed. God bless this man because together we got it done in 2 hours!!

Weeding was pretty frustrating at times because the shapes were so large it was difficult to figure out what was what - which is when my test vinyl in my sketchbook helped. Eventually we got it done and I found that I also really liked the shapes of the negative pieces so I am using them in my studio practice :) I'm not wasting anything really so that's always awesome.

This is what it looked like before I put the transfer paper on it. It was the first time seeing just how big it'd be and at this part I was just in the home stretch and feeling good!

I didn't have anyone help me with the transfer paper but I managed to do it all by myself :)

This part was pretty fun because I was just testing out where it could go/where it looked best. Originally I was interested in placing it across two planar surfaces but it just looked better underneath the lights. So I decided to do it there.


And once I made the decision I got another one of my friends, Maria, to help me put up the first two panels. I found the application was actually pretty smooth. The great part about the walls is that you can take the vinyl off the wall, reposition, and put it back on again if you needed to. I didn't need to reposition it too much because I set myself up very well when putting the registration paper on :)
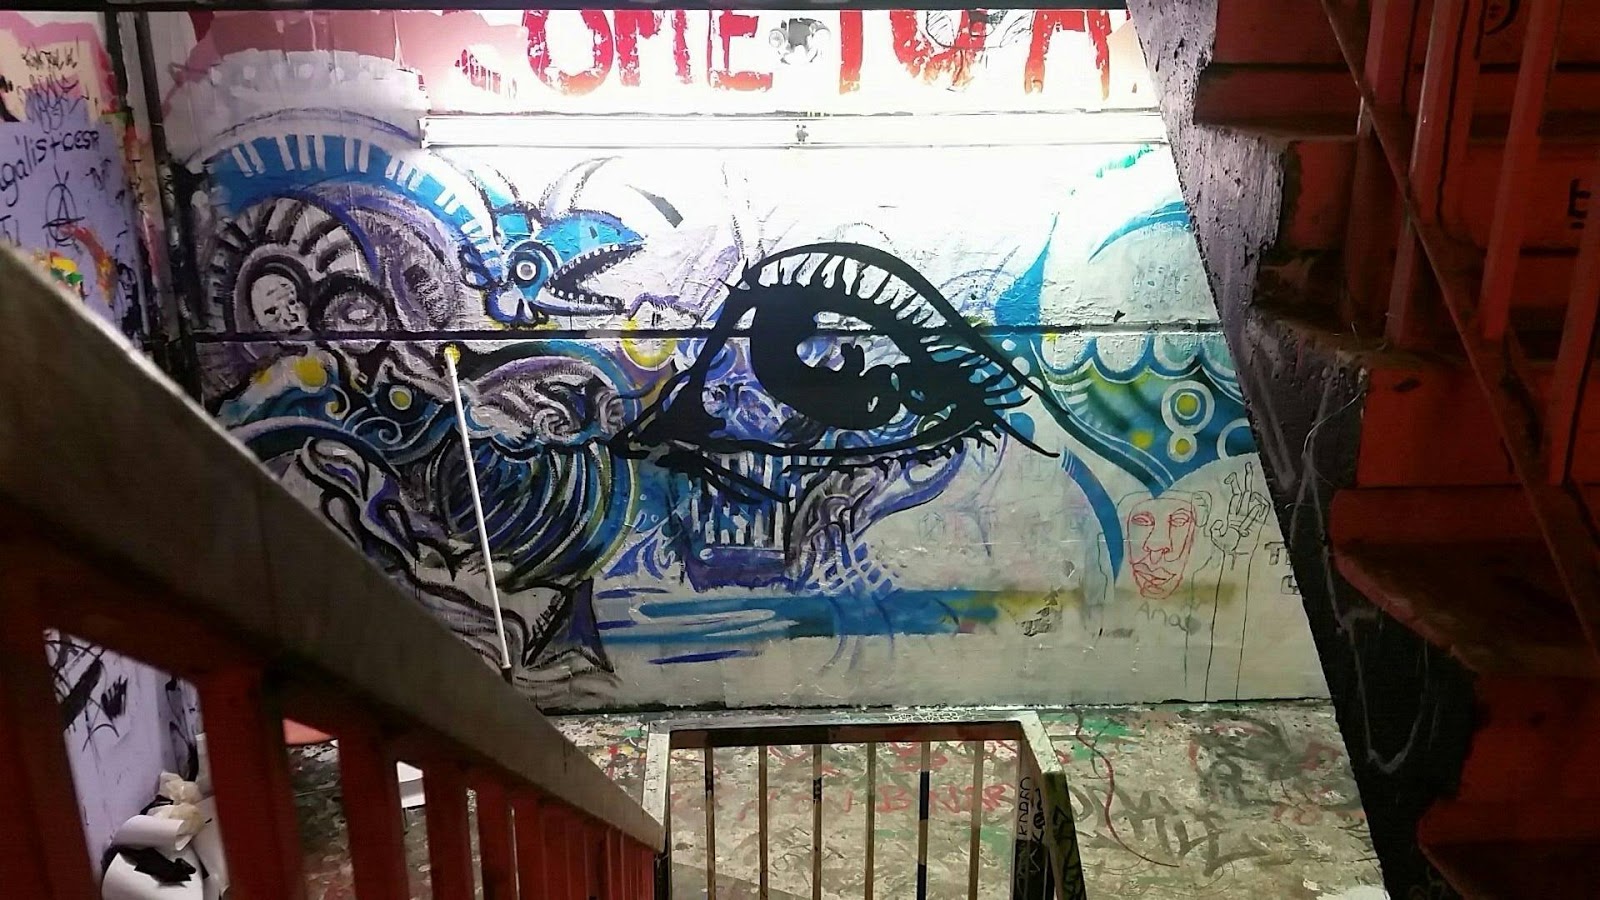
After the first two I was on my own again and had to finish it myself which wasn't too bad. I eventually got it all up! I think it looks awesome!!!! I love how it plays with the nature of the graffiti walls. The designs in the back play with the eye in such a fascinating manner, and the light above it displays the composition directly so that people can see the full effect.
Looking back I am so glad I did it because of how much I pushed myself with manipulating material, spaces, body positions and thought processes. It was a great way to create something beyond my comfort zone and having everything work out in the end was pretty exciting.


Comments
Post a Comment